How to Use the Filter Bar
This guide will show you how to use the filter bar to filter results on the tracking page.
1. Navigate to the Tracking page https://app.apc-pli.com/tracking
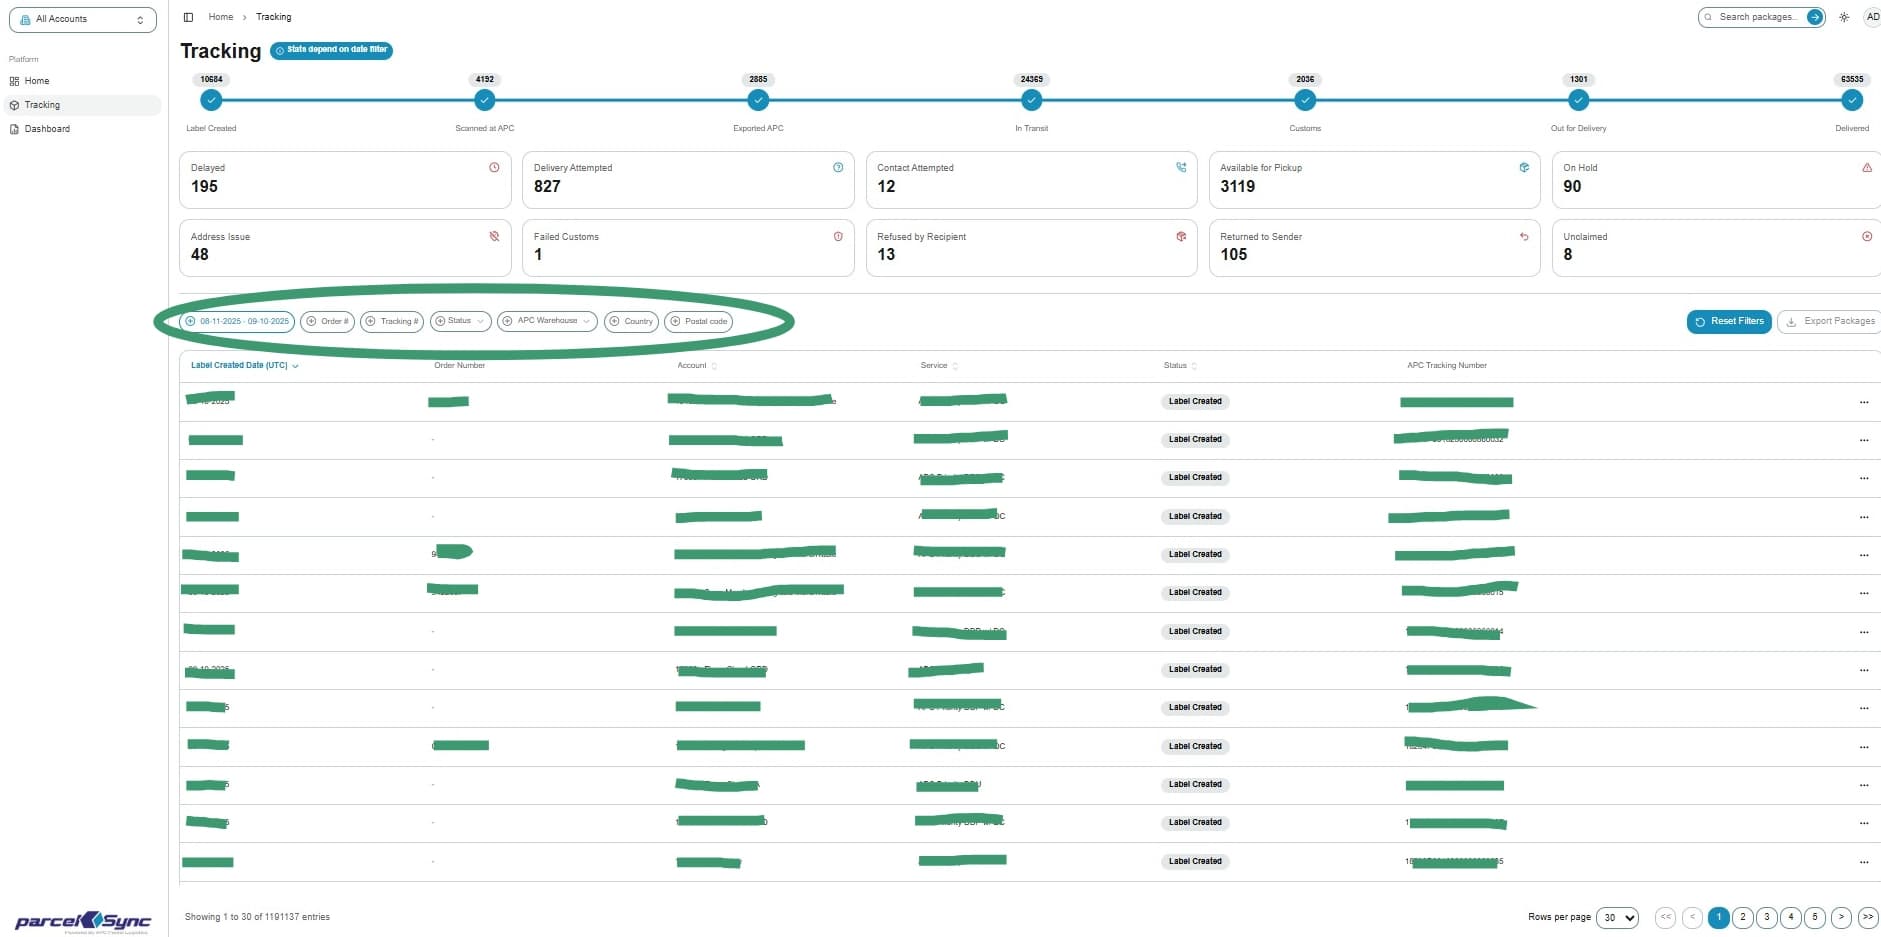
At the top of the page, above the tracking table, you’ll see the Filter Bar. This allows you to narrow table results by filters such as "Label Created Date Range", "Order #", "Status", "APC Warehouse", "Destination Country", and "Destination Postal Code".
2. Using filters
To apply a filter:
- Click inside the desired filter field
- Type and/or select a value from the filter dropdown
3. Updated view
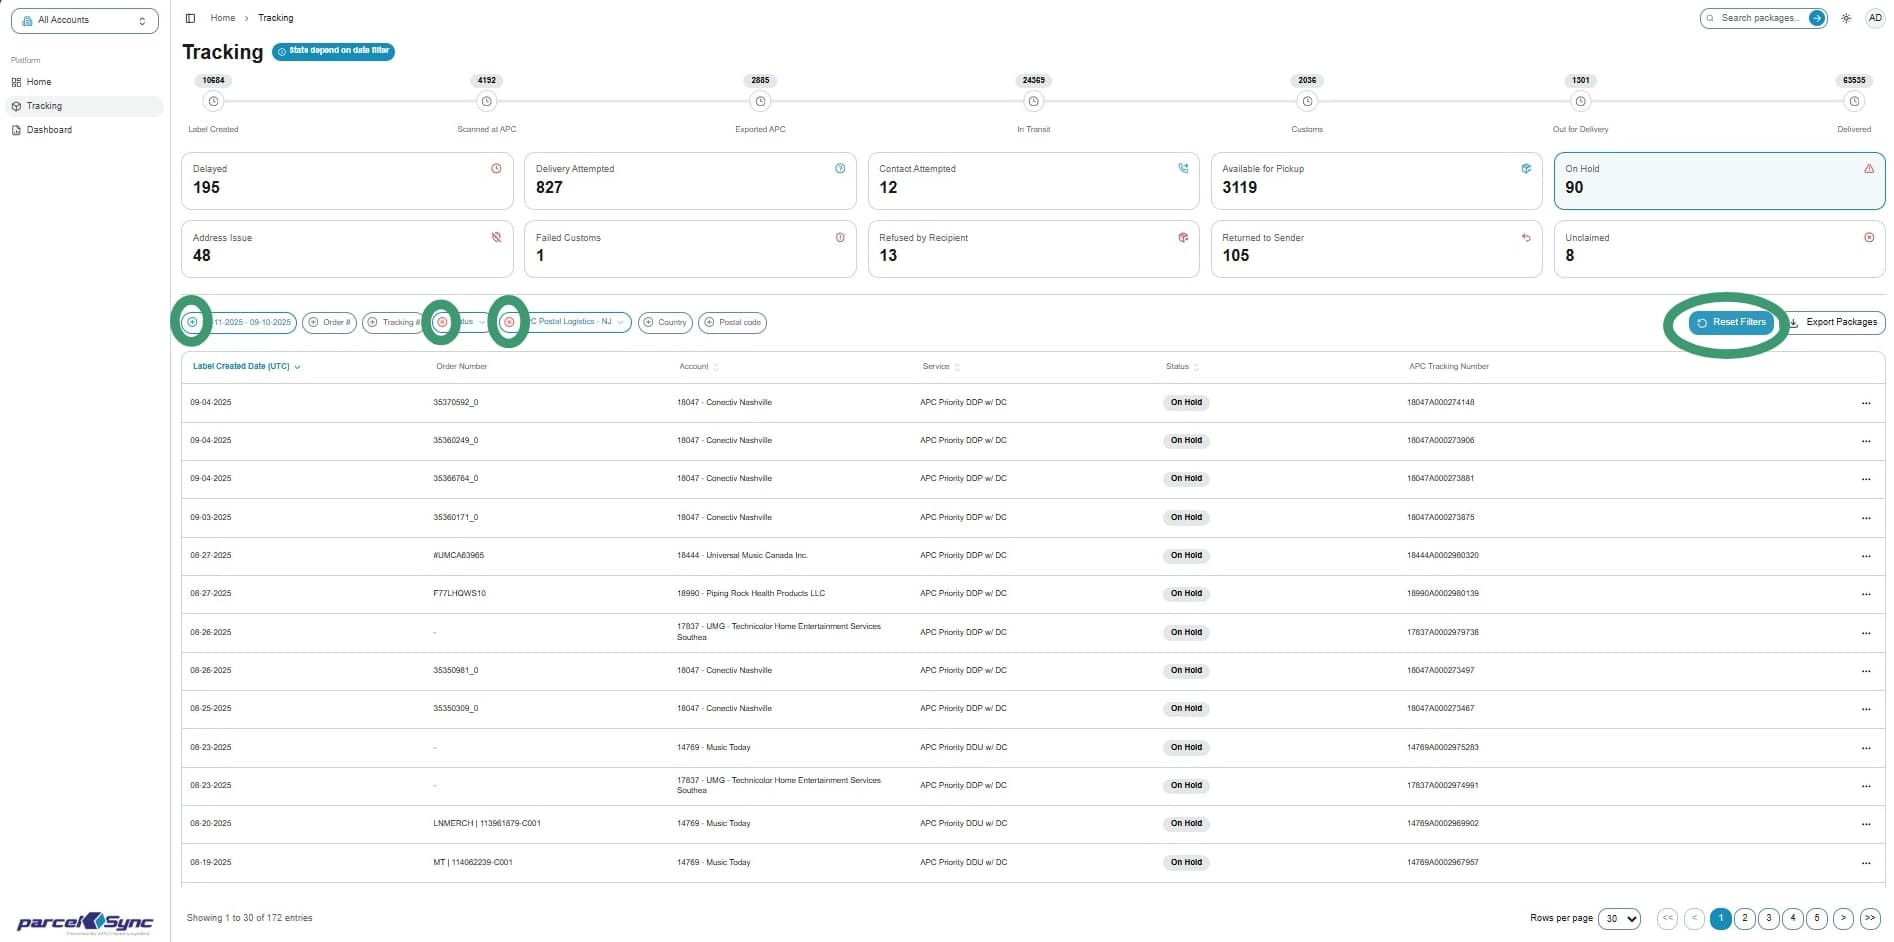
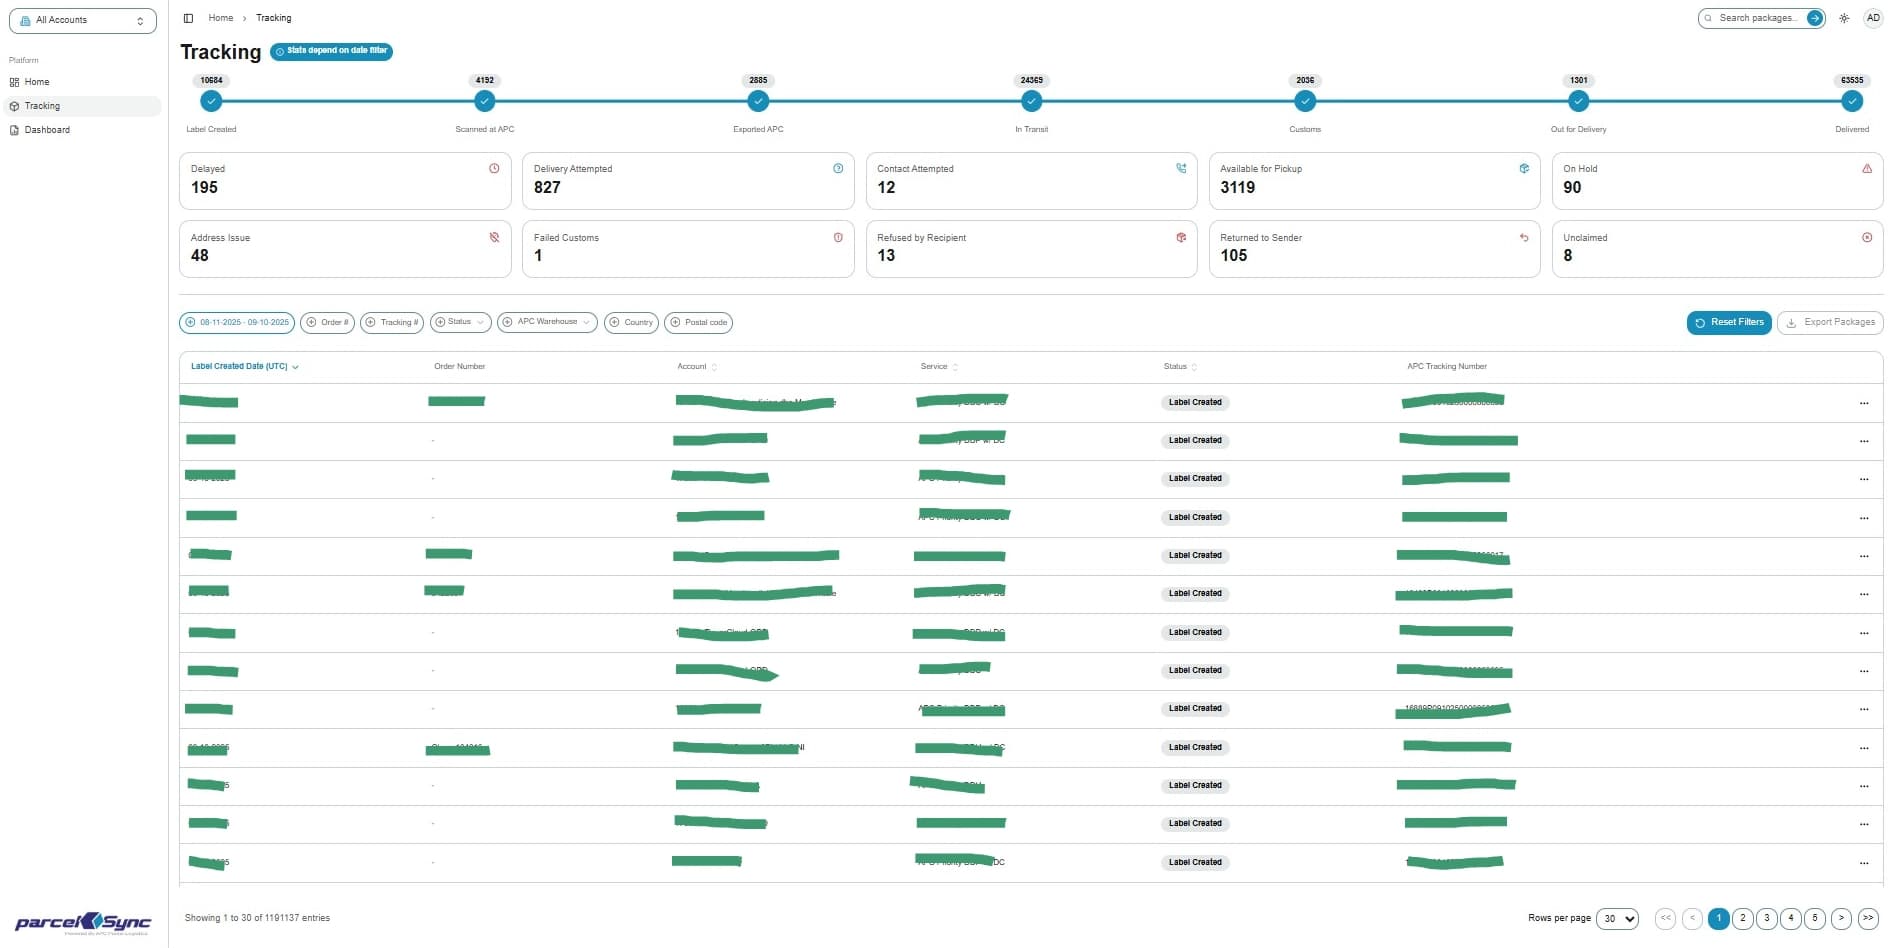
Once a filter is applied, the tracking table updates automatically to show only the records that match your selection. All active filters will display with a blue halo.
Note: The Label Created Date Range Filter will always default to Last 30 Days unless modified
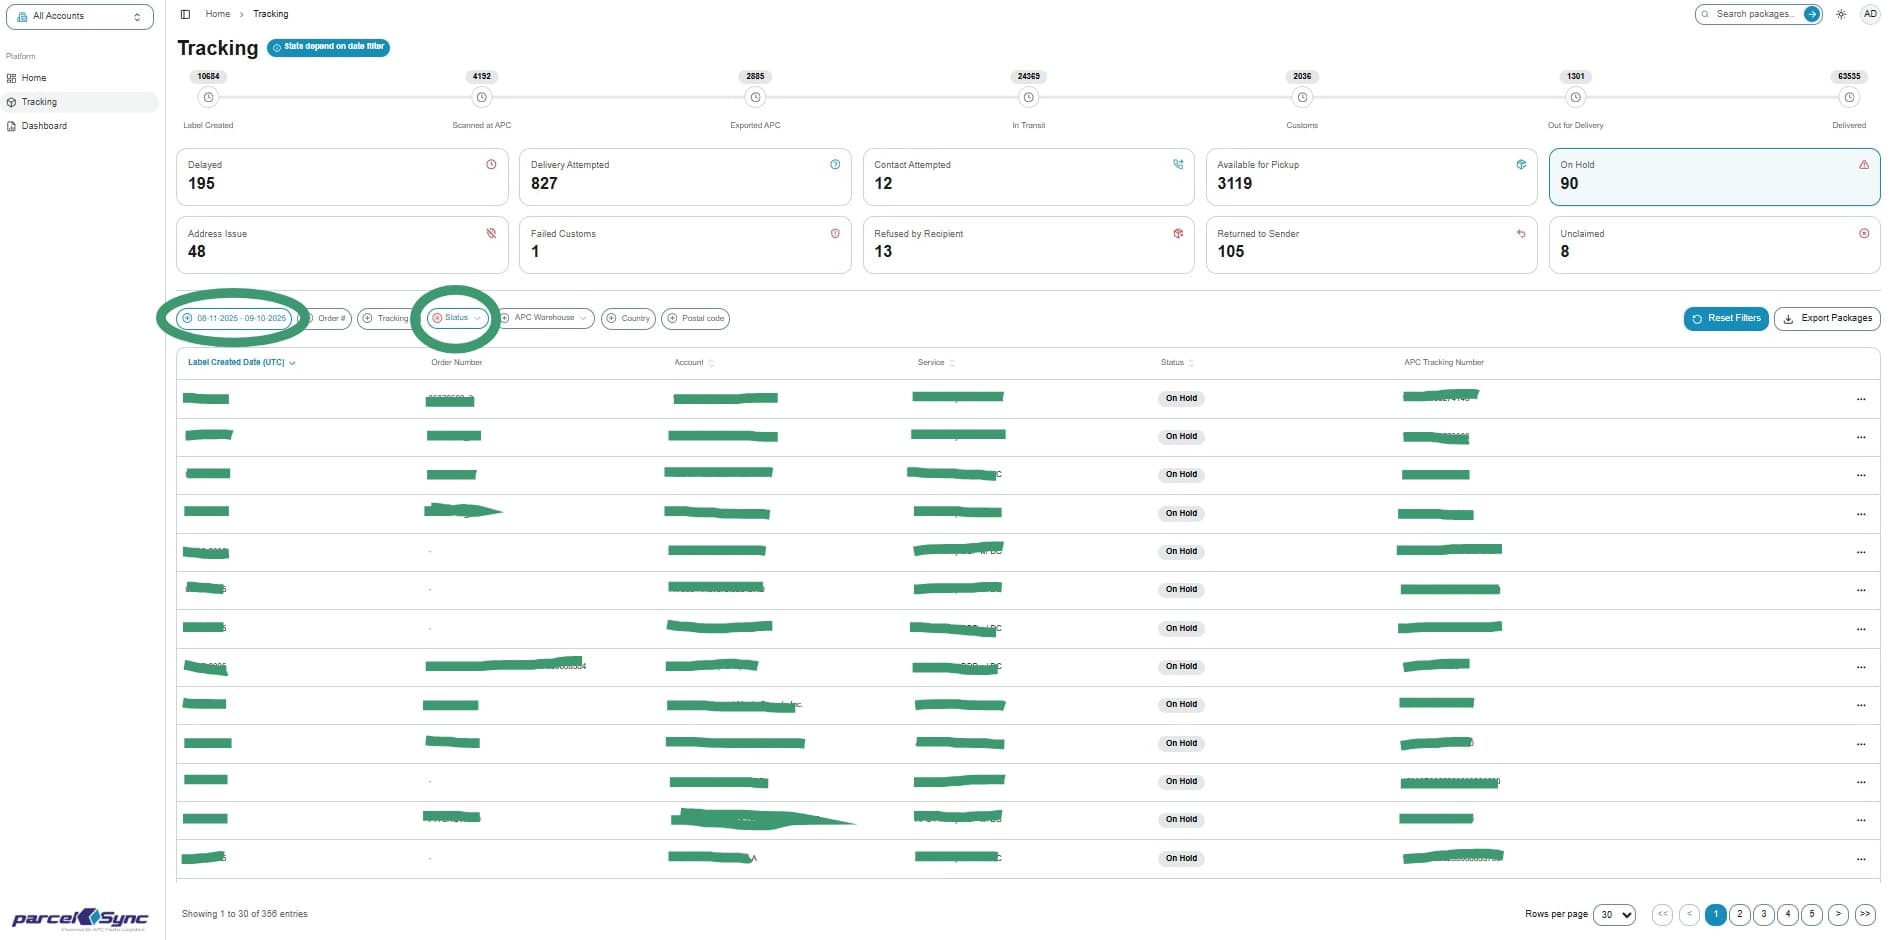
4. Multiple filters
You can apply multiple filters at the same time. All active filters will display with a blue halo, and the tracking table will automatically adjust
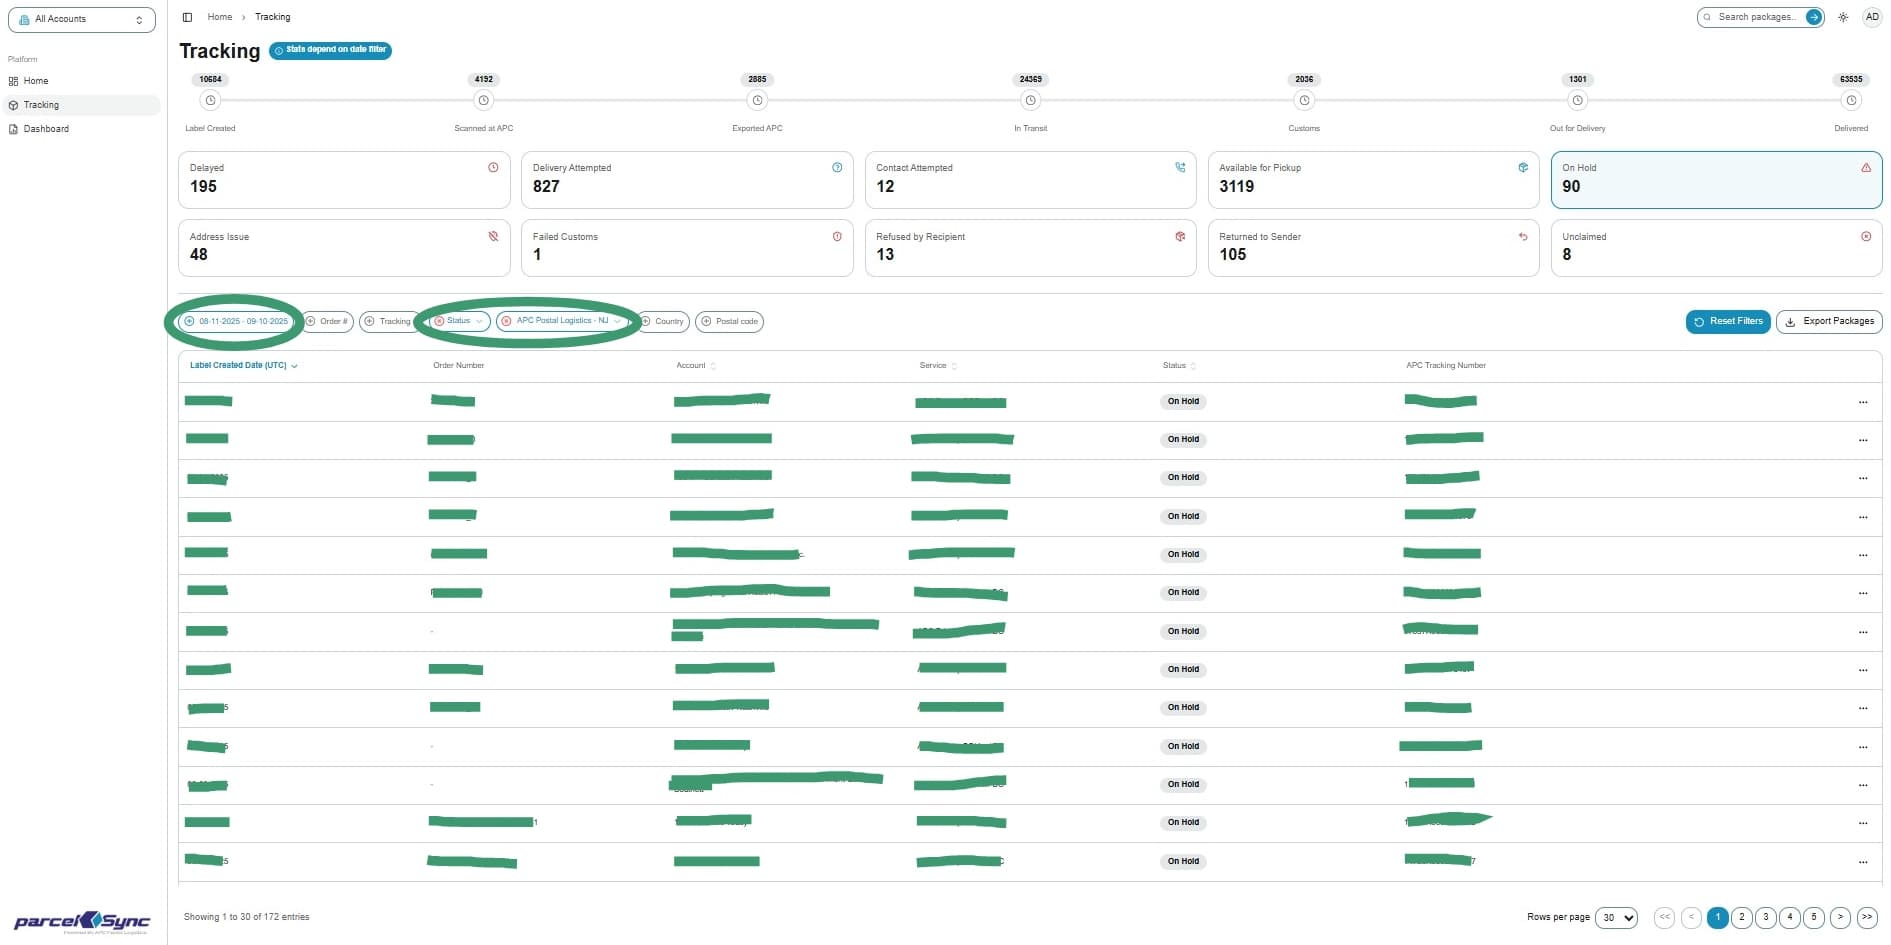
5. Removing filters
To remove a filter:
- Click on the "X" within the filter pill you want to remove
- If you remove the "Label Created Date Range Filter", it will return to the Last 30 Days default
- Or Click "Reset Filters" to remove all applied filters instantly